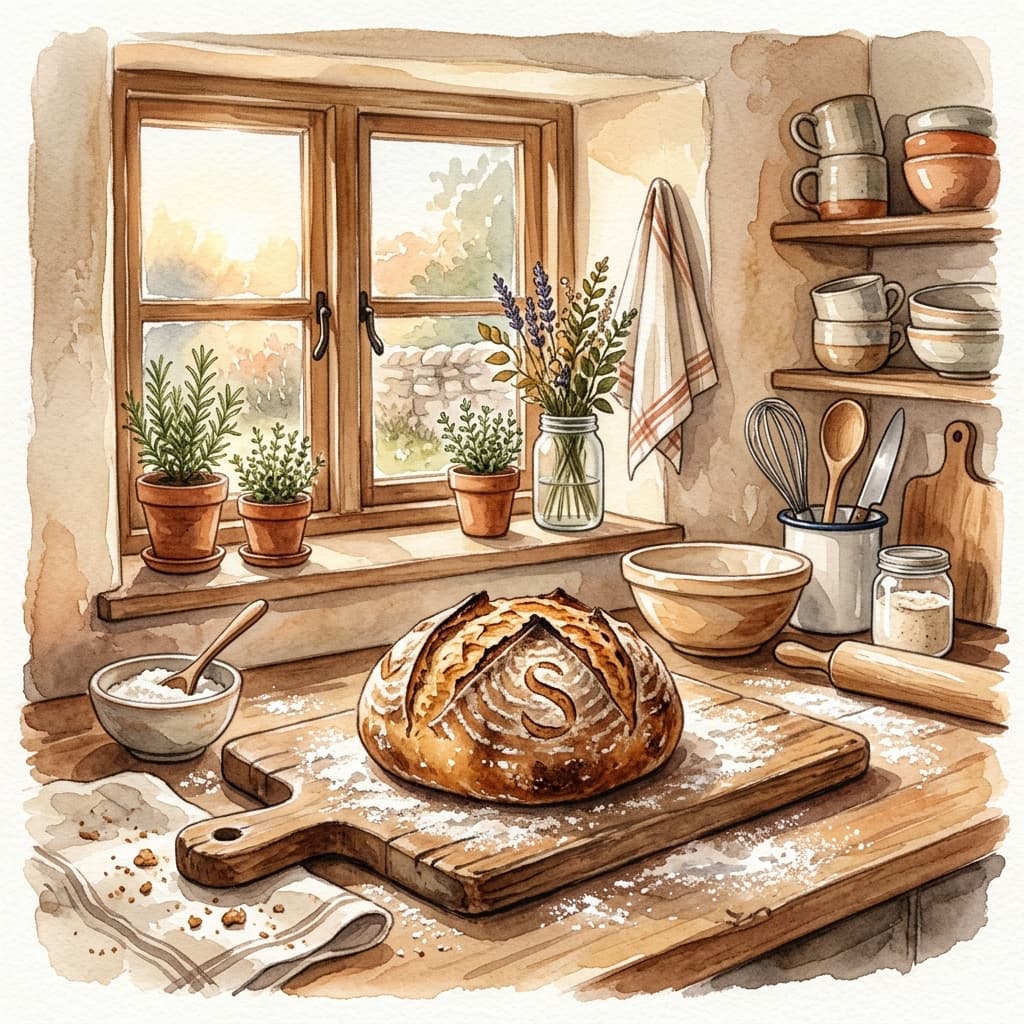
Introduction
A journey that changed everything about how I feed my family
My sourdough journey started in 2014 when I had to change everything about my understanding of food preparation. It has always been important to me to cook healthy, natural foods from scratch for my family, and I was always taught that whole grain breads were superior to "white bread."
We had just had an expensive and disappointing diagnosis from the dentist, and I needed to understand why. I knew we had great dental hygiene, and I knew the issue had to be a deeper problem. We were on a road trip to South Dakota, and I was reading a book that shattered my understanding of "healthy" foods. I remember being in the middle of nowhere in Nebraska and feeling like we couldn't eat anything normal anymore. This book was telling me to soak my beans, eat bone broth, and eat sourdough bread only.
After feeling completely overwhelmed at first, I began to dive deeply into traditional cooking methods. I learned about the antinutrients that are in the foods we eat. I began to learn how improperly prepared whole wheat and whole grain breads were a disaster for our oral and digestive health. I read several books and did as much research as I could, and in 2014, when baby number 3 was just a few months old, I realized that it was time to learn how to bake sourdough bread.
When we got home from our trip, I had no idea what I was doing, but I made a sourdough starter. I made mistakes. It is a miracle my starter survived my lack of knowledge, but somehow I got one going. We ate rock-hard bread, flat bread, and bread that was black on the bottom. I had 3 young children, I was homeschooling, and life was crazy, but I kept going. When I tell people I bake sourdough almost daily and that they can be a sourdough baker, too, the most common phrase I hear is some variation of, "Oh, I don't have time to keep track of a sourdough starter." The truth is, most people do have time to bake their own sourdough bread. Anyone can be a sourdough baker if they make their starter and their dough work around their schedule.
Anyone can be a sourdough baker if they make their starter and their dough work around their schedule.
This book is a quick guide to help you have sourdough baking success in the middle of your busy life. Even if you travel often, work long hours, have small children, have an entire flock of children, or just don't have much energy to invest into learning a new thing. I start this book by diving right into the information that is important to know. After that, I explore reasons why sourdough baking is such an important skill for your health and the science behind what is happening during those hours that you leave your dough to do its thing.
The Sourdough Starter
Your new best friend in the kitchen
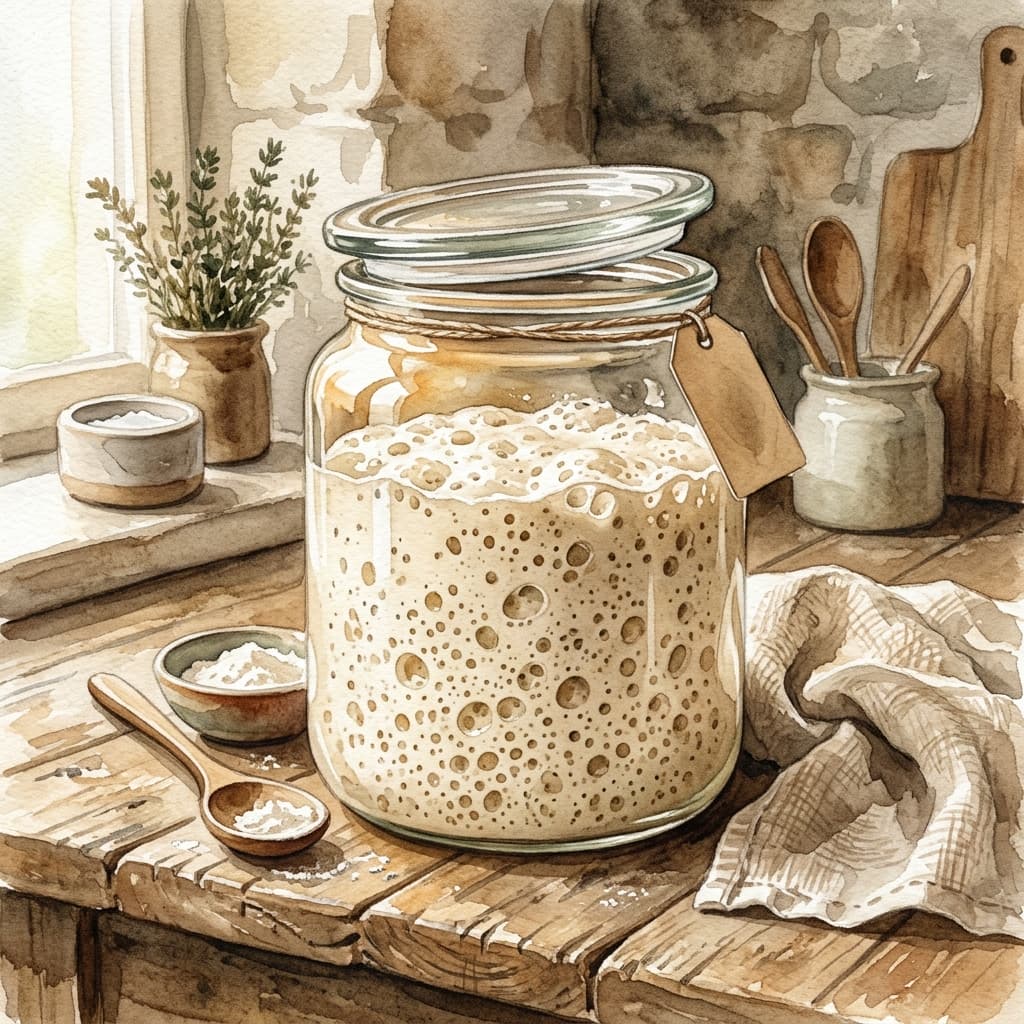
The best way to start a sourdough starter is to know the right people. Do you have a friend who bakes sourdough bread? Ask for a pinch of starter! If you are like I was back in 2014 when I started this journey, and you don't know anyone who bakes sourdough bread, it's time to make your own. You can do this the fast way by buying dehydrated sourdough starter online or in your favorite health food store, or you can make your own. If you are making your own from scratch, this is the only time in your sourdough journey that you will have to dote on your starter daily. Think of it as the newborn stage. It only lasts a week or two, but the results are worth the effort. This is also the only time I will ever suggest that you should discard any of your starter. A common myth is that you have to discard some of your starter every time you feed, but I never discard and you won't have to either.
Think of it as the newborn stage. It only lasts a week or two, but the results are worth the effort.
To begin a starter, use about ⅓ cup of flour and ¼ cup of water. Cover your bowl with a lid that is not airtight but that also won't dry out your starter. Often I just set a plate over the bowl or leave my jar lid loose. Your starter needs access to air to collect wild yeast spores from your environment! You will want to feed your new starter about twice a day, and it will live on your counter. With each feeding, remove half of the old starter before feeding. Eventually, in a day or two, you will start to see bubbles. This means the yeast is present and carbon dioxide (a byproduct of fermentation) is being produced. After about a week of dedicated feeding, you should have a starter that doubles in size every time it is fed. This is your sign that you are ready to bake. Also, at the point that your starter bubbles and doubles, you should keep it in the refrigerator. The refrigerator gives your starter a chance to slow down and rest. A starter that is constantly on the counter, needing to be fed can become tired and overworked. I only bring my starter out of the refrigerator if I know I will need to make bread.
To maintain your starter, you should feed it about ½ cup of flour and about ⅓ cup of water. I only feed my starter after using it to make bread, which means I don't have to discard any starter. I am also not very precise about feeding measurements. I look at the consistency and determine if it is the consistency that I want. If it is a cold starter, I want it to be thicker, and if it is warm, you should be able to pour it out of your jar.
Diagnosing Starter Problems
QMy starter does not bubble or grow when I feed it. Nothing happens.
This could be a result of temperature, environment, and/or time. Your new starter will take longer to activate in the winter, so make sure it is in the warmest place possible. Make sure your starter's environment is not filled with antimicrobial sprays in the air, and make sure not to use chlorinated water and bleached flour. Make sure your starter has a loose lid to allow it to "breathe." It could be that you should try a different brand or type of flour. Stay consistent and give it time!
QMy starter is watery and has a strong vinegar-like smell.
Your starter is hungry! Feed it more frequently. Once you have a bubbly, active starter, keep it in the refrigerator so it will not need so many feedings. Refrigerator time helps to keep your starter strong!
Most Important Information
- I strongly recommend that your flour is unbleached and organic to ensure no chemicals interfere with the microbiome you are trying to create. It is also important that the water you use does not have chlorine because chlorine will actively work against your efforts.
- Once your starter begins to bubble and grow with each feed, keep it in the refrigerator with a loose lid, only taking it out when you are ready to bake.
- After you have an established starter, only replace what you use for a bake and you will never have to discard.
Mixing Bread
Four ingredients, endless possibilities
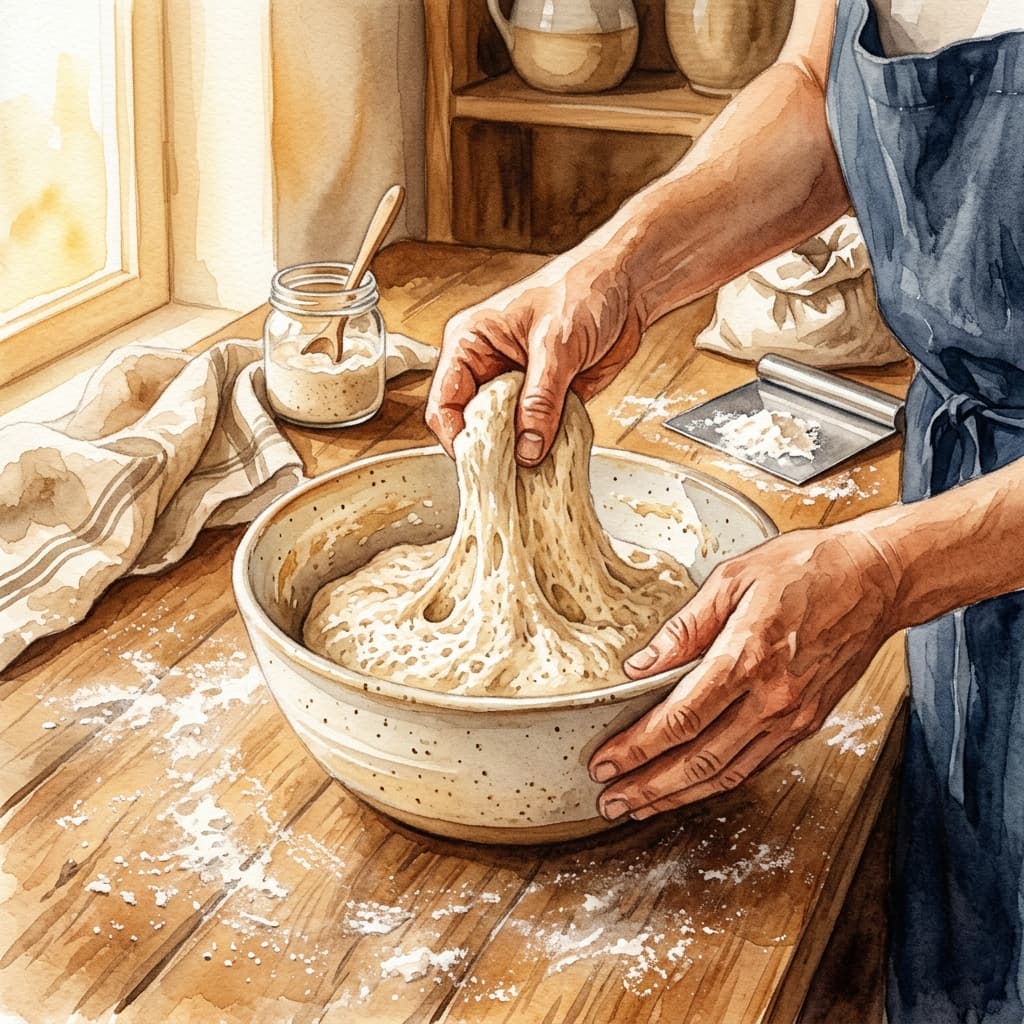
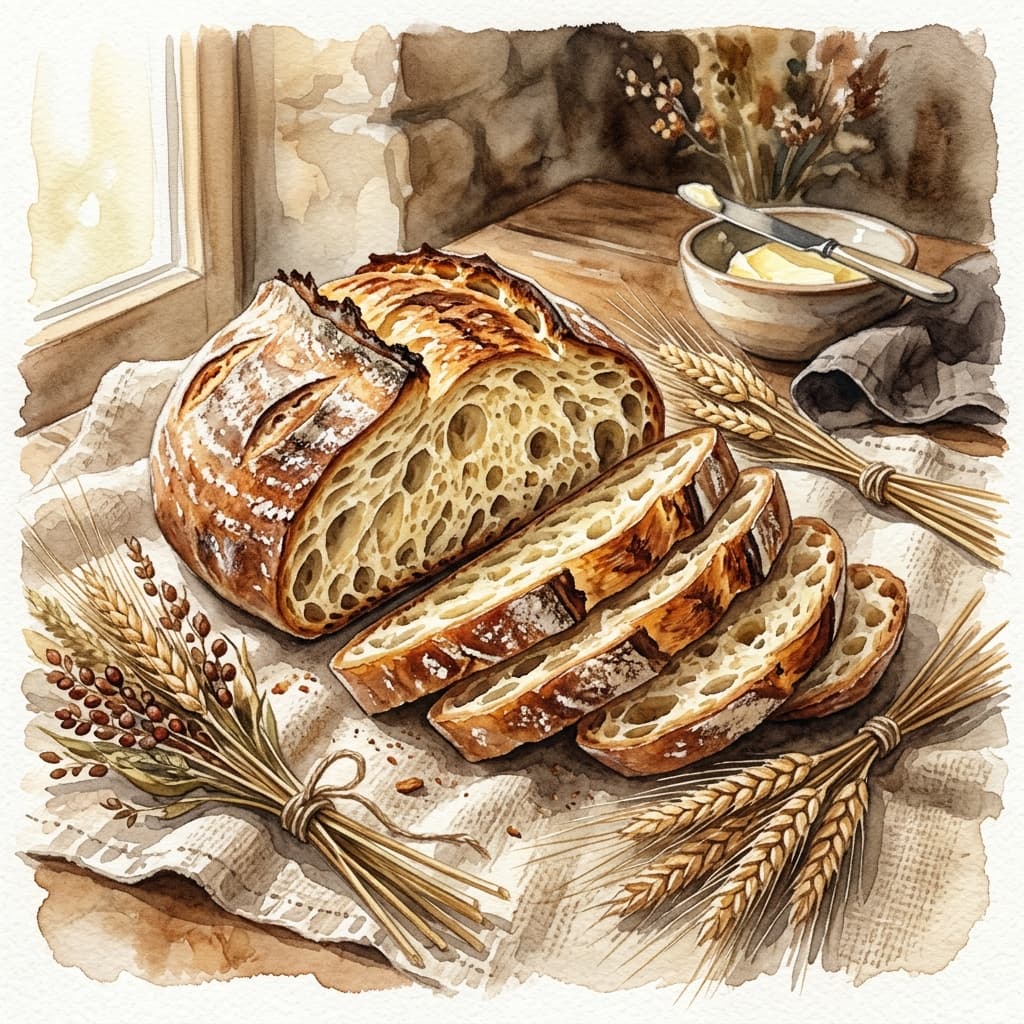
Once you have a strong, active starter, it is time to bake! I recommend buying a stand mixer with a dough hook, but many people make their bread by mixing and kneading with their hands. A mixer is not a must, but it can be very helpful. I also recommend buying a kitchen scale. Many sourdough recipes measure in grams. I made sourdough bread for many years before buying a scale, so it is not an absolute necessity. My basic sourdough bread has four ingredients: flour, water, salt, and starter. I simply put all of the ingredients into the bowl together and mix until the bread has come together, forming a boule (a ball of dough). This is my simple recipe that I have been making for my family for almost ten years:
Basic Sourdough Bread
Ingredients
- 3 ½ cups flour (438 g)
- 2 tsp salt (11 g)
- ½ cup active sourdough starter (113 g)
- 1 ½ cups water (360 g)
Instructions
Mix all ingredients in a stand mixer with a dough hook or by hand until a boule (ball of dough) forms. Cover and let rest.
Important: This is the time to feed your starter! Feed it to replace what you have used for your bread recipe, and you will never have to discard again. I typically feed it ½ cup of flour and ⅓ cup of water, but this can be increased to 1 cup of flour and ¾ cup of water depending on how much starter you need. After feeding it, if you don't need it in the next few hours, put it back into the refrigerator to slowly ferment.
Stretch and Fold
After mixing your bread ingredients, cover your bowl and let the dough rest for 30 minutes to an hour. Come back to your dough and begin to do what is called "stretch and fold." This simply means you will stretch your dough out, strengthening the gluten strands. You do not want to tear the dough, but you want to stretch it in all directions and then fold it back over itself. After a few "stretch and folds," you will find that it is not possible to continue stretching the dough. It will become more firm.
At this point, shape it into a ball and cover the bowl. Many sourdough enthusiasts insist that this stretch and fold action should be repeated another time or two, and this would truly strengthen your dough for an optimal loaf. The goal for this book, though, is to make a sourdough bread that does not require you to revisit your dough often. My goal is to show how homemade sourdough bread is possible for busy people. As a busy mom, I rarely stretch and fold more than one time. Some people I know never do the stretch and fold step after mixing their ingredients the first time, and that is okay. Their bread is delicious without this step. I like to do it once, because I think it shapes the dough nicely, and I like the finished bread better.
Proofing
Now it is time for your bread to proof, which means that it will sit in its bowl for several hours. Many people like to use a banneton with rice flour on their dough (to prevent sticking), and that is a great idea! I don't do this. I simply leave it in my mixing bowl with a cover. Depending on the temperature of your kitchen, your bread should proof (ferment) for at least 8 hours. I often let it sit for 12–15 hours, and I have been known to wait 20 hours. If you ferment your bread longer than 20 hours on the counter, you run the risk of it over-fermenting, and it will lose its rise. It will collapse and become a very sour, slightly dense sourdough loaf. If your bread over-ferments, don't despair! Focaccia bread is a fabulous way to use your dough! Many people love to decorate their focaccia bread with vegetables, and it can be a fun way to salvage an overfermented loaf. Also, over-fermented bread can make some delicious French toast or croutons.
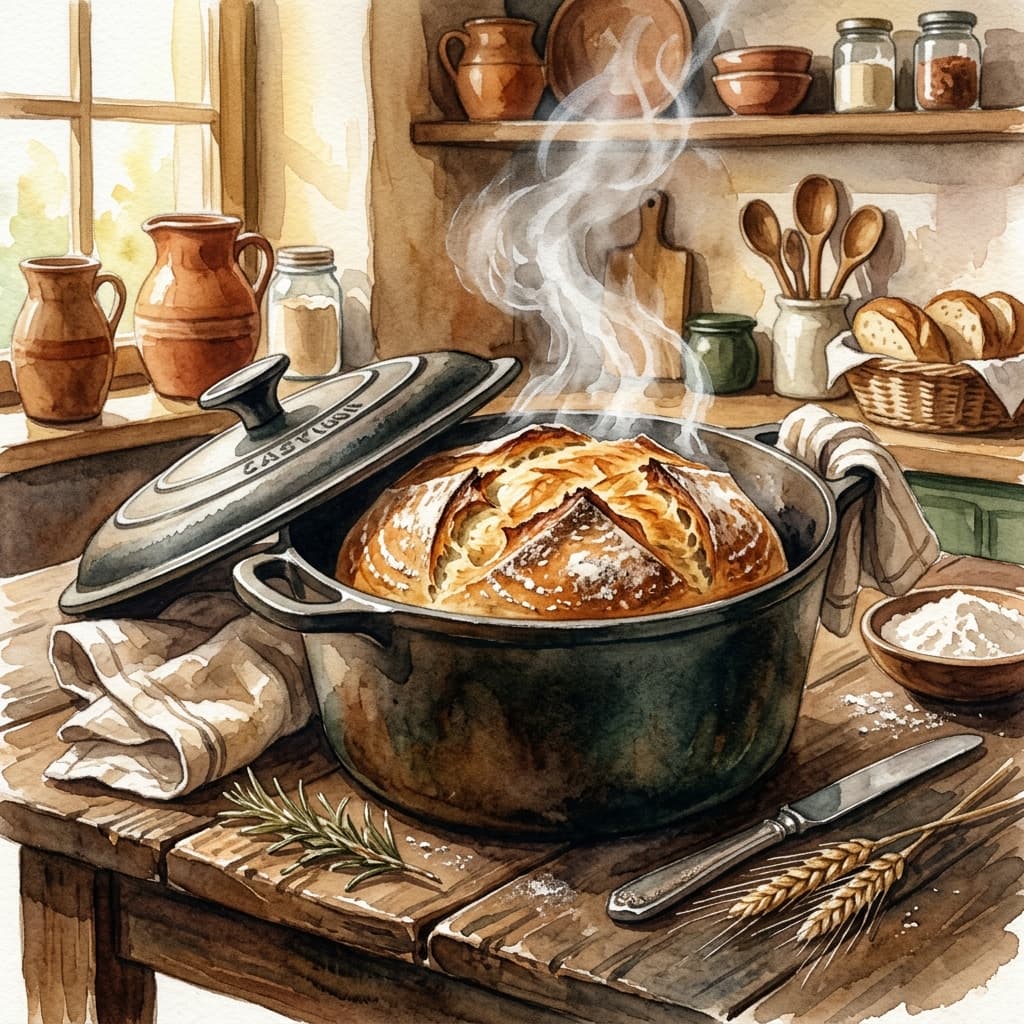
Baking
When it is time to bake your loaf, set your oven to 450 degrees. It is ideal to bake your loaf in a cast iron Dutch oven with a lid. This provides a type of convection baking that will give you the best loaf. Preheat your pan in the oven, including the lid! I have tried preheating the Dutch oven without the lid, and my loaves did not bake well. It was an interesting discovery! Once your oven and pan are preheated, transfer your loaf to your Dutch oven.

Scoring
The final step is optional but fun. Many sourdough bakers like to score or cut the top of their bread with a very sharp knife or razor blade, which makes a beautiful design on the loaf and gives the bread a direction in which to rise. Often I will score my bread right through the middle, but many people decorate their bread in beautiful ways. If you do want to have beautiful decorations when you score your bread, place it in the refrigerator for at least an hour with no lid to firm the top of the bread, making it easy to get a clean cut. I have friends and family who never score their bread, and that is okay too!
Set your oven timer for 35–40 minutes. Your bread should have a nicely browned color on top when it is done. If your bread is darker than you prefer on the bottom, place a baking stone or dish under the Dutch Oven to disperse the heat. If you want more color on your bread, bake it another 5–10 minutes with the lid off.
Common Questions
QWhat happens if I mix my dough, but I can't be available to bake it when it is time? I don't want it to overproof!
You can put your dough in the refrigerator to wait for you! If you can't bake your bread on the day it is supposed to be baked, that is okay! Put it in the refrigerator and bake it another day. I have put dough in the refrigerator for a week, and I was able to bake a beautiful loaf. Some of my best loaves have resulted from this! The slow fermentation in the refrigerator plus the beautiful score I was able to create on top of the loaf helped these loaves to be some of the best I've ever made.
QWhat if I forgot about my dough and it over-proofed?
Focaccia bread, French toast, and croutons are excellent recipes to make with over-proofed dough, but it also makes an amazing pizza crust. Over-fermented bread is quite healthy because it has the lowest glycemic index, and the harmful part of gluten is likely completely digested, which is great for gluten-sensitive people.
QWhat do I do with bread that does not rise well and is dense?
I had plenty of these loaves when I first started, and I can tell you from experience that they are excellent for making croutons, stuffing, or even bread pudding.
QWhen I bake my bread, it sticks to the bottom of my Dutch Oven.
I use a silicone bread sling, which has eliminated this problem for me. This would happen once in a while, and I decided it was worth it to buy an inexpensive bread sling. Many bakers use parchment paper, which works well.
QWhen I bake my bread, the bottom turns black or it is hard.
Place a baking dish under your Dutch oven to distribute heat more evenly.
Three Scenarios for Busy Bakers
✦“I have zero time”
Mix the 4 ingredient bread recipe either by hand or with a mixer and dough hook. Dust with flour or lightly oil with avocado oil, and cover. 8–20 hours later, preheat Dutch oven or covered baking dish, and bake at 450 degrees for 35–40 minutes.
✦“I have a tiny bit of time”
Mix the 4 ingredient bread recipe either by hand or with a mixer and dough hook and cover. Wait 30 minutes to 1 hour and do a few stretch and folds with your dough. Shape your dough into a ball, dust or oil, and cover for 8–20 hours. Score (cut) the top of the bread with a sharp knife or razor blade in the design of your choice. Bake at 450 degrees for 35–40 minutes in a preheated Dutch oven or covered baking dish.
✦“I have some extra time”
Mix the 4 ingredient bread recipe either by hand or with a mixer and dough hook and cover. Wait 30 minutes to 1 hour and do a few stretch and folds with your dough. Repeat this step 3 or 4 times every 30 minutes to 1 hour. Shape your dough into a ball, dust or oil, and cover for 8–20 hours. After the long ferment, place your dough in the refrigerator for at least an hour so your dough is firm enough for a clean score. Score (cut) the top of the bread with a sharp knife or razor blade in the design of your choice. Bake at 450 degrees for 35–40 minutes in a Dutch oven that has been preheated for at least 30 minutes (a hot Dutch oven gives maximum oven spring). Bake another 5–10 minutes to achieve the level of browning you desire.
Good to Know
Environmental factors that affect your bread
Several things can affect the outcome of your sourdough loaves, and I wanted to dedicate a chapter to addressing these things to give you the best chance for success.
Weather
The weather in your area (as well as inside your house) will have a direct effect on your bread.
Temperature
If you live in a cold climate or it is winter time, you should plan to give your bread more time to proof. When it is a very cold day in winter, I will mix bread at night and plan to bake it for dinner the next day. This is because my house is several degrees cooler during the winter than during the summer. During the heat of the summer, I have to keep an eye on my bread because it will quickly overproof during the hot afternoon, although my house is air-conditioned.
Humidity
If you live in a humid environment, your bread dough will ferment more quickly than it will in a dry climate. The humidity in the air adds to the hydration of your dough, and dough with higher hydration will ferment more quickly. Some bakers consider a humid environment ideal for proofing sourdough bread because the fermentation happens more quickly. Oven humidity is also a consideration for baking your bread. Some bakers throw an ice cube on the top of their bread before closing the lid, and this gives the crust a crispy, flaky texture without browning too quickly. Low oven humidity will brown the outside of the bread too quickly without properly baking the inside of the loaf. A dry climate can be a wonderful environment for baking, as well. If you live in a dry climate, it would be best if you cover your dough well with a wet towel or plastic wrap to keep the dough moist. If the dough is exposed to dry air, you will have a "skin" form on the top, which could affect your final oven spring. If a crust develops, you can brush it with water or oil and cover it with a damp towel.
Altitude
If you are preparing sourdough at a high altitude, you will have to make some adjustments to your sourdough process. Higher altitudes have lower air pressure and lower humidity. As bread ferments, carbon dioxide gas is formed. Gasses expand more quickly when air pressure is lower, so the carbon dioxide in your dough will expand more quickly. This simply means that fermentation will happen faster. Because of this, it will be easier to overproof your dough at high altitudes, no matter the temperature. The lower humidity could dry your dough out, so you will need to make sure your dough has a moist environment as it proofs. If you notice that your dough is drying out, add a tiny amount of water and do a stretch and fold to incorporate the water. Cover with a damp towel or plastic wrap. If you have already done the stretching and folding that you planned to do, and your dough is beginning to dry out, you can brush the top of the dough with water and cover it with plastic wrap to provide an air-tight, moist environment.
Altitude should also be a consideration as you bake your bread. Increase your oven temperature by 20–25 degrees in a high altitude location to set your oven spring faster. Because of this increase in temperature, check your bread 5 minutes earlier than any recipe calls for. Most recipes are developed for sea level, and high-altitude baking will require some adjustments.
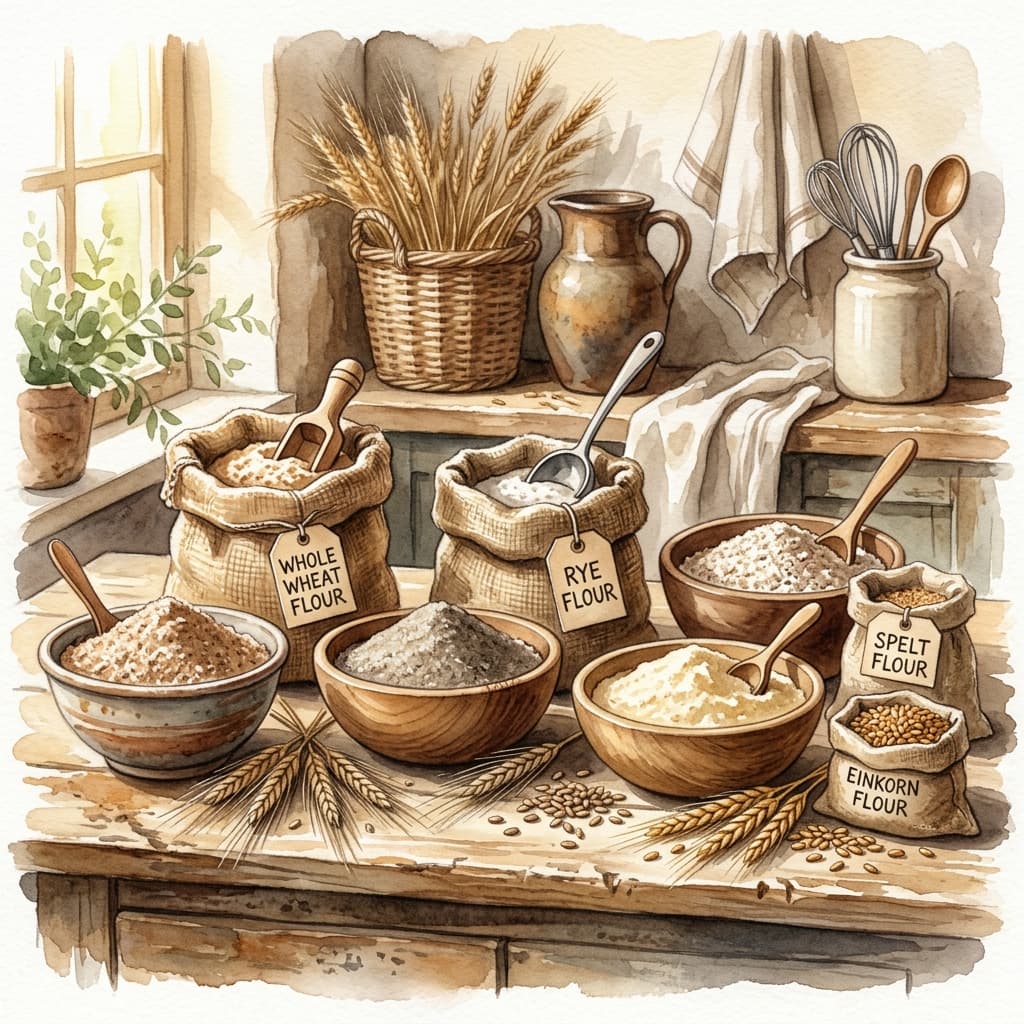
Flour Types
Different types of flour will affect your sourdough experience. This book is written from the perspective of using organic all-purpose wheat flour that is not a whole grain. Here are a few types of flours and how they will affect your experience:
Whole Wheat Flour
Whole wheat flour is very nutritious, and fermenting it will help these nutrients to be available to you without anti-nutrients (more about this later). Whole wheat flour will ferment more quickly than flour that is not a whole grain. The wild yeast in your sourdough will rapidly consume the bran and wheat germ of the whole wheat due to the nutrients present. Also, the gluten strands will be easily broken by the added bran and wheat germ, so whole wheat is a more fragile dough. Because of this, it will be harder to achieve a high oven spring.
Rye Flour
Adding rye flour will give your bread a delicious flavor and add moisture, giving your bread a wonderful, soft texture. It is high in nutrients, and this will cause your dough to ferment more quickly, so be careful to avoid overproofing. The gluten is weak, so it is a more fragile dough, which could affect oven-spring. Since it has such a weak gluten, kneading it is not necessary.
Einkorn Flour
This is my favorite alternative flour to use because of its delicious, nutty flavor. It has a weaker gluten strand, and the dough will be stickier than regular flour. When the dough is sticky, wet hands will help make it easier to work with. Einkorn does not need much kneading, and it will ferment faster than regular white flour.
Water
Your water should be chlorine-free and medium-hardness. Tap water can contain chlorine and other disinfectants, which can harm the yeast in your sourdough. Sourdough likes a neutral pH or slightly acidic pH over an alkaline water. Filtered spring water is an excellent option. Some bakers suggest using distilled water, but I disagree with this. The yeast in sourdough thrives when you give it water with minerals in it.
Why Sourdough
More than just delicious bread
This chapter will be a short one that will explain why I find sourdough to be worth everyone's time, and the following chapter will dive deeply into the science behind why sourdough is so beneficial.
If you are reading this book, you likely know how delicious homemade sourdough bread can be, but you may be asking yourself if the time and effort of making your own sourdough bread is worth it. This is one of my favorite subjects to talk about because, in our society, bread has become a contentious subject. Bread has been a staple in many societies for thousands of years. For many people, bread made with wheat flour and commercial yeast makes them feel sluggish and sick. After eating delicious rolls at a restaurant, you may go home with brain fog, exhaustion, and even an upset digestive system. Gluten is likely to be the reason for this, so if gluten makes people feel bad, why would I write a book about making bread with gluten? I even mentioned stretching and folding your dough to strengthen the gluten strands.
The fermentation process creates a gluten molecule that does all the things we want gluten to do in our bread without any of the harmful effects on our bodies.
The short answer is that the fermentation process creates a gluten molecule that does all the things we want gluten to do in our bread without any of the harmful effects on our bodies. Thanks to sourdough fermentation, we can have a high oven-spring and strong, well-formed bread with none of the digestive issues. The next chapter will dive into the details of this.
My personal experience with bread made with commercial yeast is that it has always left me feeling tired and sluggish with brain fog and digestive issues. I have never had this problem from consuming sourdough bread. The beauty of making your own bread is that you can create a bread that is easy for you and your family to digest while controlling the ingredients that go into it. I prefer to use organic flour because I believe glyphosate is harmful, but likely other unnecessary ingredients are hiding in your store-bought bread. If you look at a bread label, you may be surprised to see added ingredients that should not be in bread. My homemade breads contain flour, water/milk, salt, sourdough starter, and sometimes butter and honey. My sourdough bread is easily digested by all, including those with gluten sensitivities, and it is a part of our diet that I am so thankful to be able to provide for my family.
A Little Science
Understanding what happens during fermentation
Gluten is a word that can really stir people up in our society. Some people avoid it at all costs. Some people think the avoiders have lost their minds. Some know that it makes them feel bad, and others are truly allergic to it. Gluten is a large molecule, and no matter your stance on gluten, it truly is difficult for the human body to digest. A small percentage of people have celiac disease, which means they have a true allergy to gluten, and a large percentage of the population could claim some level of sensitivity to gluten. Sourdough bread is the solution to the gluten problem. There was a time in history when commercial yeast was not available, and the only way to make leavened bread was sourdough. Gluten sensitivity was mostly unknown at this time.
Beneficial Bacteria (Lactobacillus)
The beauty of sourdough bread is that when gluten strands are exposed to the beneficial bacteria found in sourdough, such as lactobacillus, these bacteria release enzymes that pre-digest the harmful portion of the gluten molecule, which is called gliadin. This leaves behind the second portion that makes up gluten, which is called glutenin. Glutenin provides amazing structural support to your loaf, which gives high oven-spring, and this structural support remains after the lactobacillus have pre-digested the gliadin. This means you can have a beautiful, well risen, sourdough loaf that you can enjoy with none of the digestive issues that can come with eating commercial yeast bread.
Another benefit of these beneficial bacteria is that they digest the sugars that are naturally found in breads. This can help those who need to monitor the glycemic index of their foods, such as diabetics. The longer the fermentation time of the bread, the more sour it will taste because the carbohydrates and starches are digested by the friendly bacteria. It also seems that the bacteria change the structure of the carbohydrates in the bread, which helps the body digest it more slowly, preventing an insulin rush.
4 hours of fermentation time is enough to remove 80% of the harmful gliadin from the gluten molecule. A standard fermentation of 8–20 hours will be enough to have bread that is safe for almost anyone to consume.
It has been shown that 4 hours of fermentation time is enough to remove 80% of the harmful gliadin from the gluten molecule. If fermentation continues, this percentage continues to rise, so a standard fermentation time of 8–20 hours will be enough to have bread that is safe for almost anyone to consume. It has even been shown to be safe for some celiacs to eat sourdough that has been long fermented or even over-fermented, although, if a celiac person is very sensitive to gluten, I would use caution and suggest that person seek the advice of a medical professional before eating sourdough bread. Often, people who are sick and struggling to eat or digest any kind of food can tolerate long-fermented sourdough bread because it is so gentle for the gut. If a person is highly sensitive to gluten, it is best if the dough over-ferments (or comes close to over-fermenting) so the lactobacillus will pre-digest as much of the gluten as possible. Sourdough is a gut-friendly food because, although lactobacillus are killed during the baking process, the bread contains prebiotics, which feed the beneficial bacteria present in your gut, giving them an environment in which they can thrive.
Another special perk of baking sourdough bread is that it resists the growth of mold! I have had sourdough bread turn moldy, but it takes many days. If you have made homemade bread with commercial yeast in the past, you may know that mold will start to grow on it quickly, and dangerous mold spores can be present often before they are visible. Sourdough bread resists mold growth because of the acids produced by lactobacillus bacteria.
Sourdough bread is the healthiest bread you can eat because the good bacteria digest phytic acid, which is an antinutrient that is mainly found surrounding nuts and seeds. So, if your preference is to eat whole-grain bread, this is especially important for you. Nuts and seeds (such as grains) have many vitamins and minerals, but these minerals are protected inside of a casing that prevents your body from accessing these minerals. Phytic acid found in the outer casing of nuts and seeds will bind to minerals in your body, causing them to be unavailable for absorption. It has been shown that sourdough bread digests these phytates, allowing minerals, such as iron, calcium, magnesium, copper, and zinc to be more available to the body.
Finally, a benefit of sourdough is that it helps keep you feeling full longer than bread made with commercial yeast. The carbohydrates in sourdough bread are digested slowly, which is beneficial for your gut, your insulin levels, and your hunger. If you want to eat a breakfast that keeps you full for several hours, eat some sourdough waffles or sourdough toast. You won't necessarily be consuming more calories than normal, it is just that these calories will stay with you, keeping you from feeling like you need to eat again an hour after breakfast.
Some of My Favorite Recipes
Beyond basic bread

Sourdough Waffles
Ingredients
- ½ cup sourdough starter (113 g)
- 2 eggs
- ½ cup avocado oil (108 g)
- ½ tsp vanilla (2 g)
- 2 cups flour (250 g)
- ¼ tsp salt (1.5 g)
- 1 ¾ cups milk (429 g)
- 4 tsp baking powder — added after fermentation (19 g)
Instructions
Using a paddle attachment and a stand mixer, mix the sourdough starter with the eggs. Add the oil and vanilla. In a separate bowl, mix the flour and salt. Add the flour mixture to the egg mixture and mix slowly as you add the milk. After it is mixed, cover to ferment for 8–20 hours. After fermentation, sprinkle the baking powder on the batter and mix it in with a spoon or whisk. Using a waffle iron, cook the waffles. This recipe can also be used for pancakes.
Note: Some may feel more comfortable with fermenting this in the refrigerator since it has eggs and milk. I leave it out on the counter overnight to cook the next morning and it has never caused problems. This is likely because of the probiotics in the sourdough starter, which inhibit the growth of problematic bacteria. Just note that the beneficial fermentation will happen more slowly in the refrigerator.
Sourdough Pizza Crust
Ingredients
- 4 cups flour (500 g)
- ½ cup sourdough starter (113 g)
- 2 tsp salt (11 g)
- 2 Tbsp olive oil (28 g)
- 1 ¾ cup water (414 g)
Instructions
Mix ingredients in a stand mixer or by hand. After mixing, lightly coat the outside of the dough with oil and cover the bowl. After 30–60 minutes, stretch the dough and fold it until it becomes stiff. Form into a ball and cover the bowl. Let ferment for 8–20 hours. After fermentation, stretch or roll the dough out for pizza. Bake according to pizza requirements.
Sourdough Pie Crust
Ingredients
- 1 ½ cups flour (180 g)
- ½ cup butter, in small chunks (115 g)
- Pinch of salt
- ½ cup sourdough starter (113 g)
- ⅓ cup water (113 g)
Instructions
Mix flour, butter, and sourdough starter with a paddle attachment in a stand mixer. After the butter and starter are completely incorporated into the flour, add the water. Place in a covered bowl and let ferment for 8–20 hours. Roll and bake according to pie recipe recommendations.
Sourdough Naan Bread
Ingredients
- 1 cup sourdough starter (226 g)
- 1 cup warm milk (240 g)
- ½ cup Greek yogurt (113 g)
- 4 cups flour (500 g)
- 2 tsp salt (11 g)
- 1 Tbsp honey (21 g)
- 6 Tbsp melted butter (85 g)
Instructions
In a stand mixer, mix all ingredients. Place in a bowl and cover to ferment for 8–20 hours. After fermentation time, cut the dough into pieces, depending on how big you want your naan to be. My pieces are about 2 inches by 2 inches before I roll them out. Heat a cast iron skillet to medium heat. Do not oil the pan for use in this recipe. After rolling the naan, place the naan into the preheated, unoiled pan and cook until the naan begins to brown. It may also begin to puff up. Flip it to the other side, and cook the other side the same way. Repeat this process for all naan pieces.